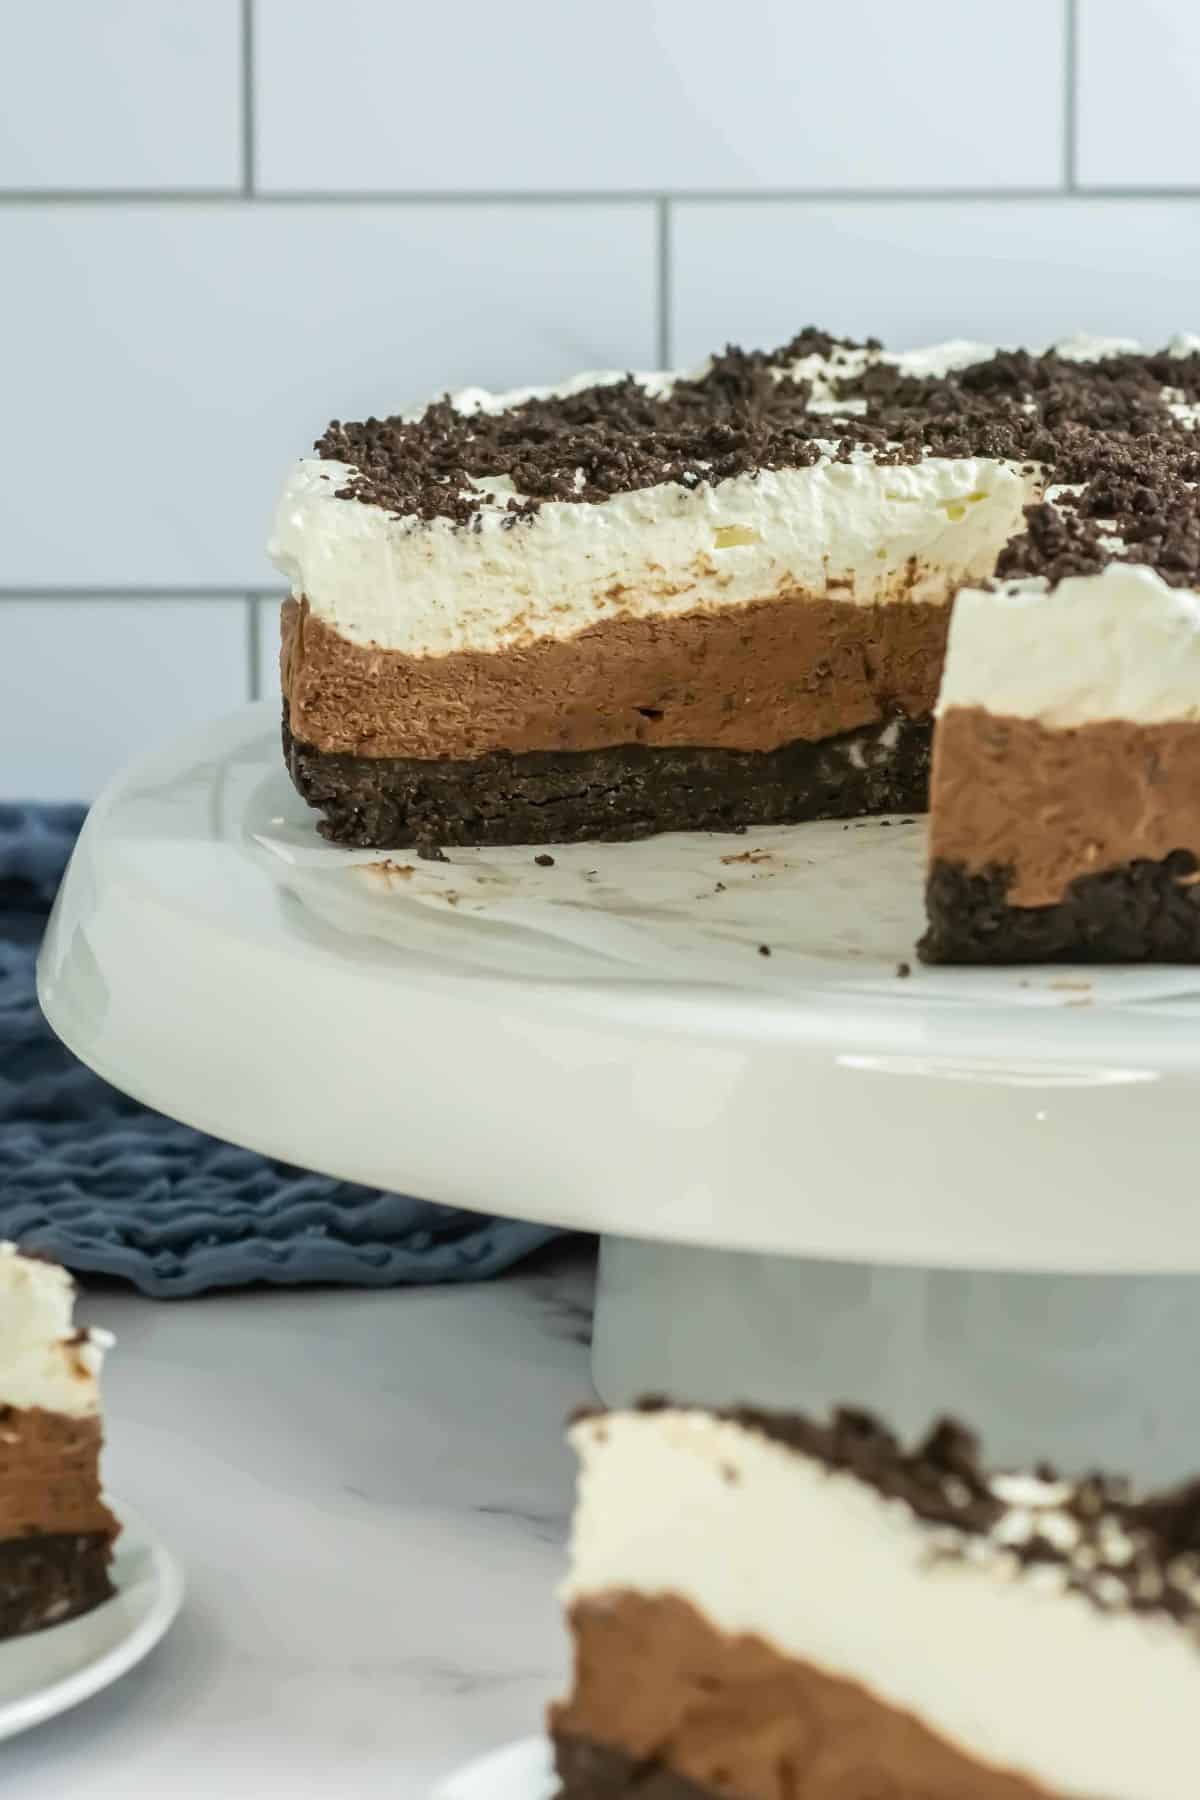
No-Bake Oreo Dessert
This No Bake Oreo Dessert has 5 ingredients (can be 4 if using Cool Whip!) You start by crushing Oreo cookies, use some to make a crust, and use heavy cream and powdered sugar to make whipped cream for the next two layers! Refrigerator, and you’re all set!
This No Bake Oreo dessert is really easy to make with just a pack of Oreos, butter, Whipped Cream, and chocolate. Sometimes, I will make it with Cool Whip instead of making my own whipped cream, which cuts down on the ingredients and prep time.
Use a springform pan or a 9×9 casserole dish, whichever you prefer, and throw it in the fridge to set.
How to make this No Bake Oreo Dessert
For detailed step-by-step instructions, be sure to check out the full recipe in the recipe card at the bottom of the page.
Never Lose This Recipe—Email It to Yourself!
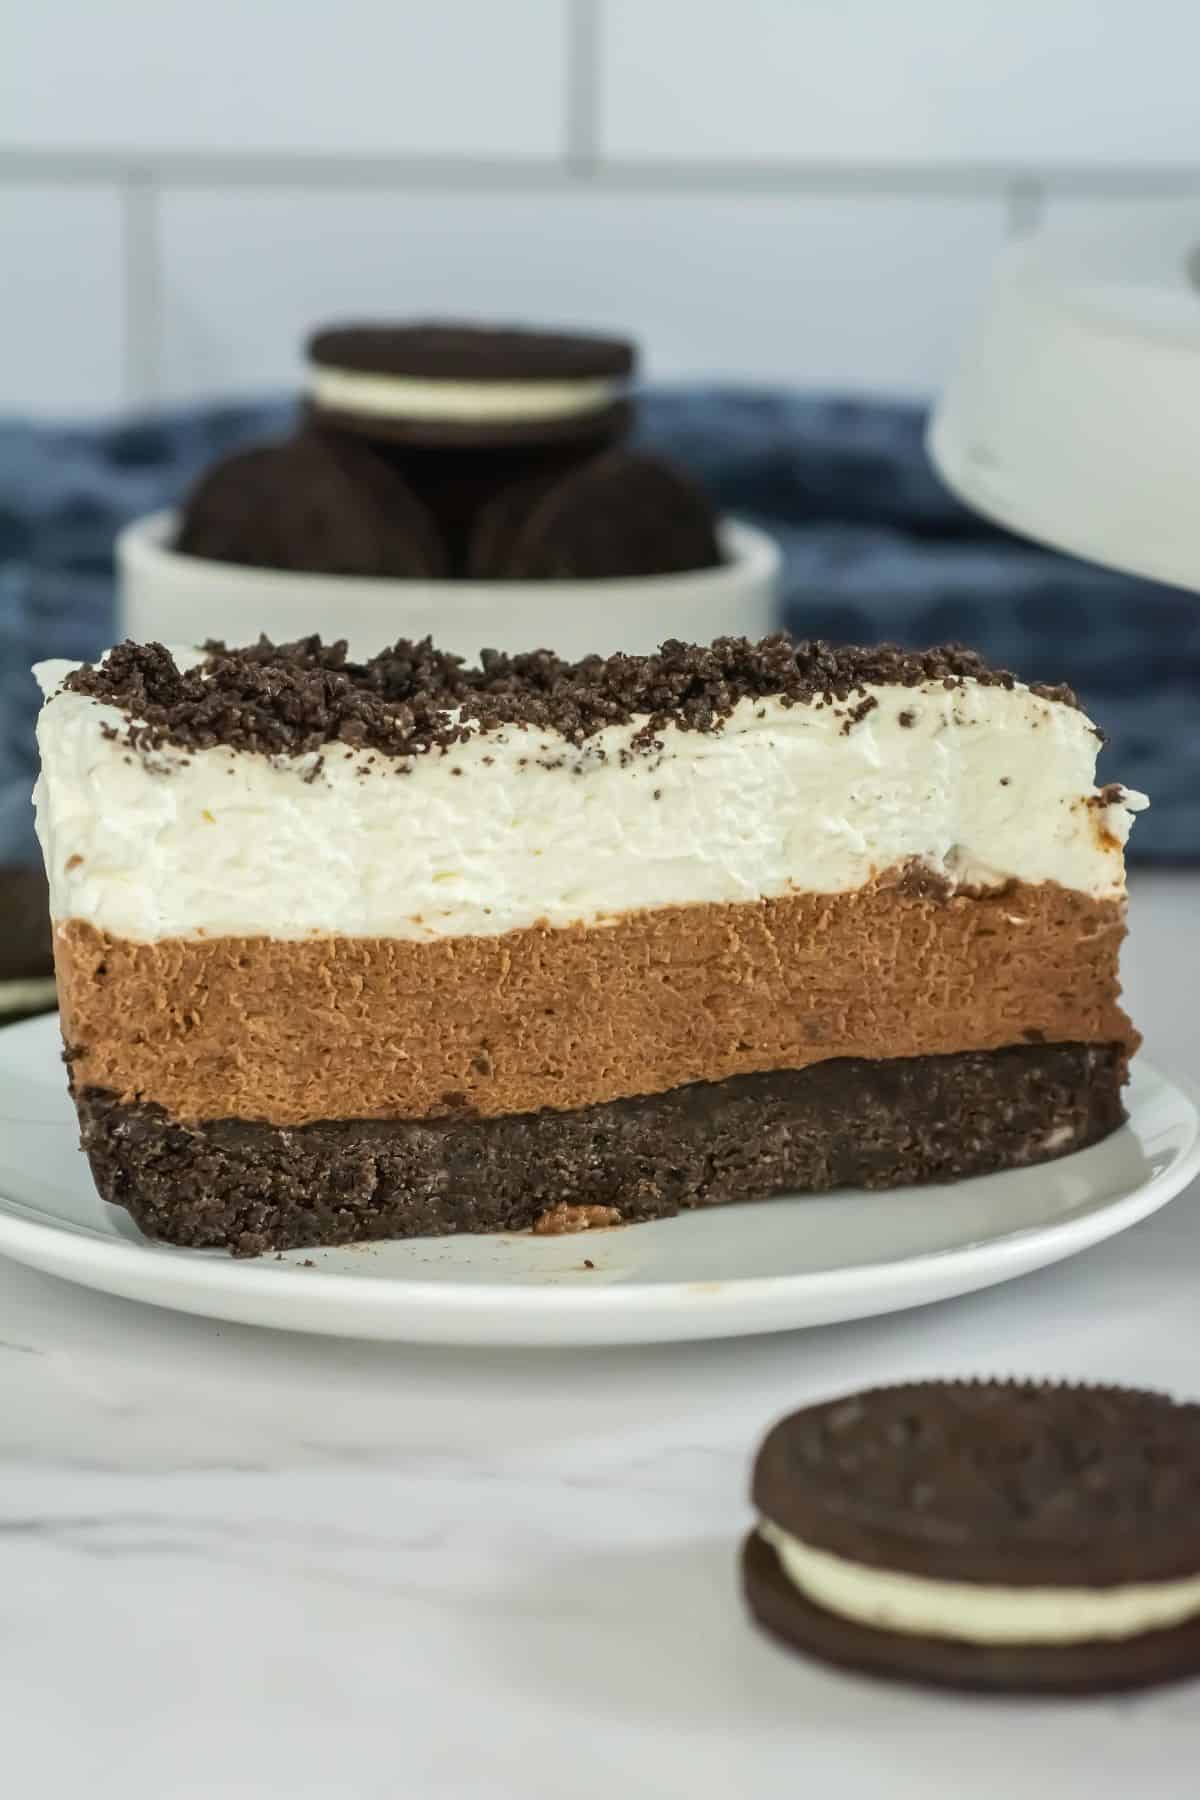
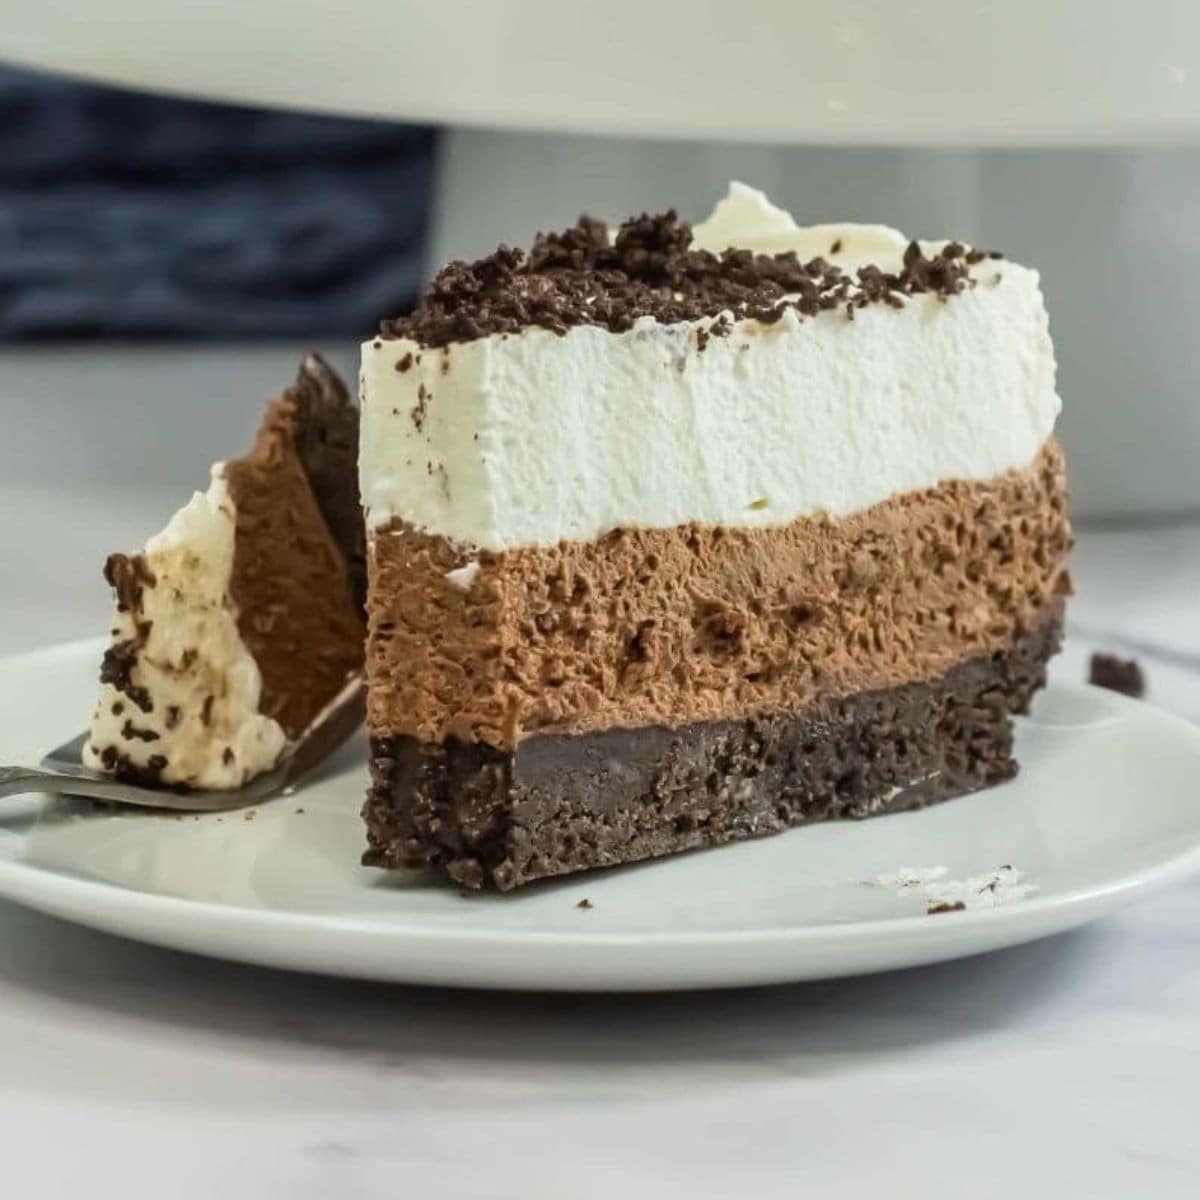
Slice and serve.
No Bake Oreo Dessert
Never Lose This Recipe—Email It to Yourself!
Equipment
Ingredients
- 14.3 ounce Oreos crushed, about 36 cookies
- ⅓ cup unsalted butter melted
- 8 ounces semi-sweet chocolate chips melted
- 3 cups heavy whipping cream
- ½ cup powdered sugar sifted, measured before sifting
Instructions
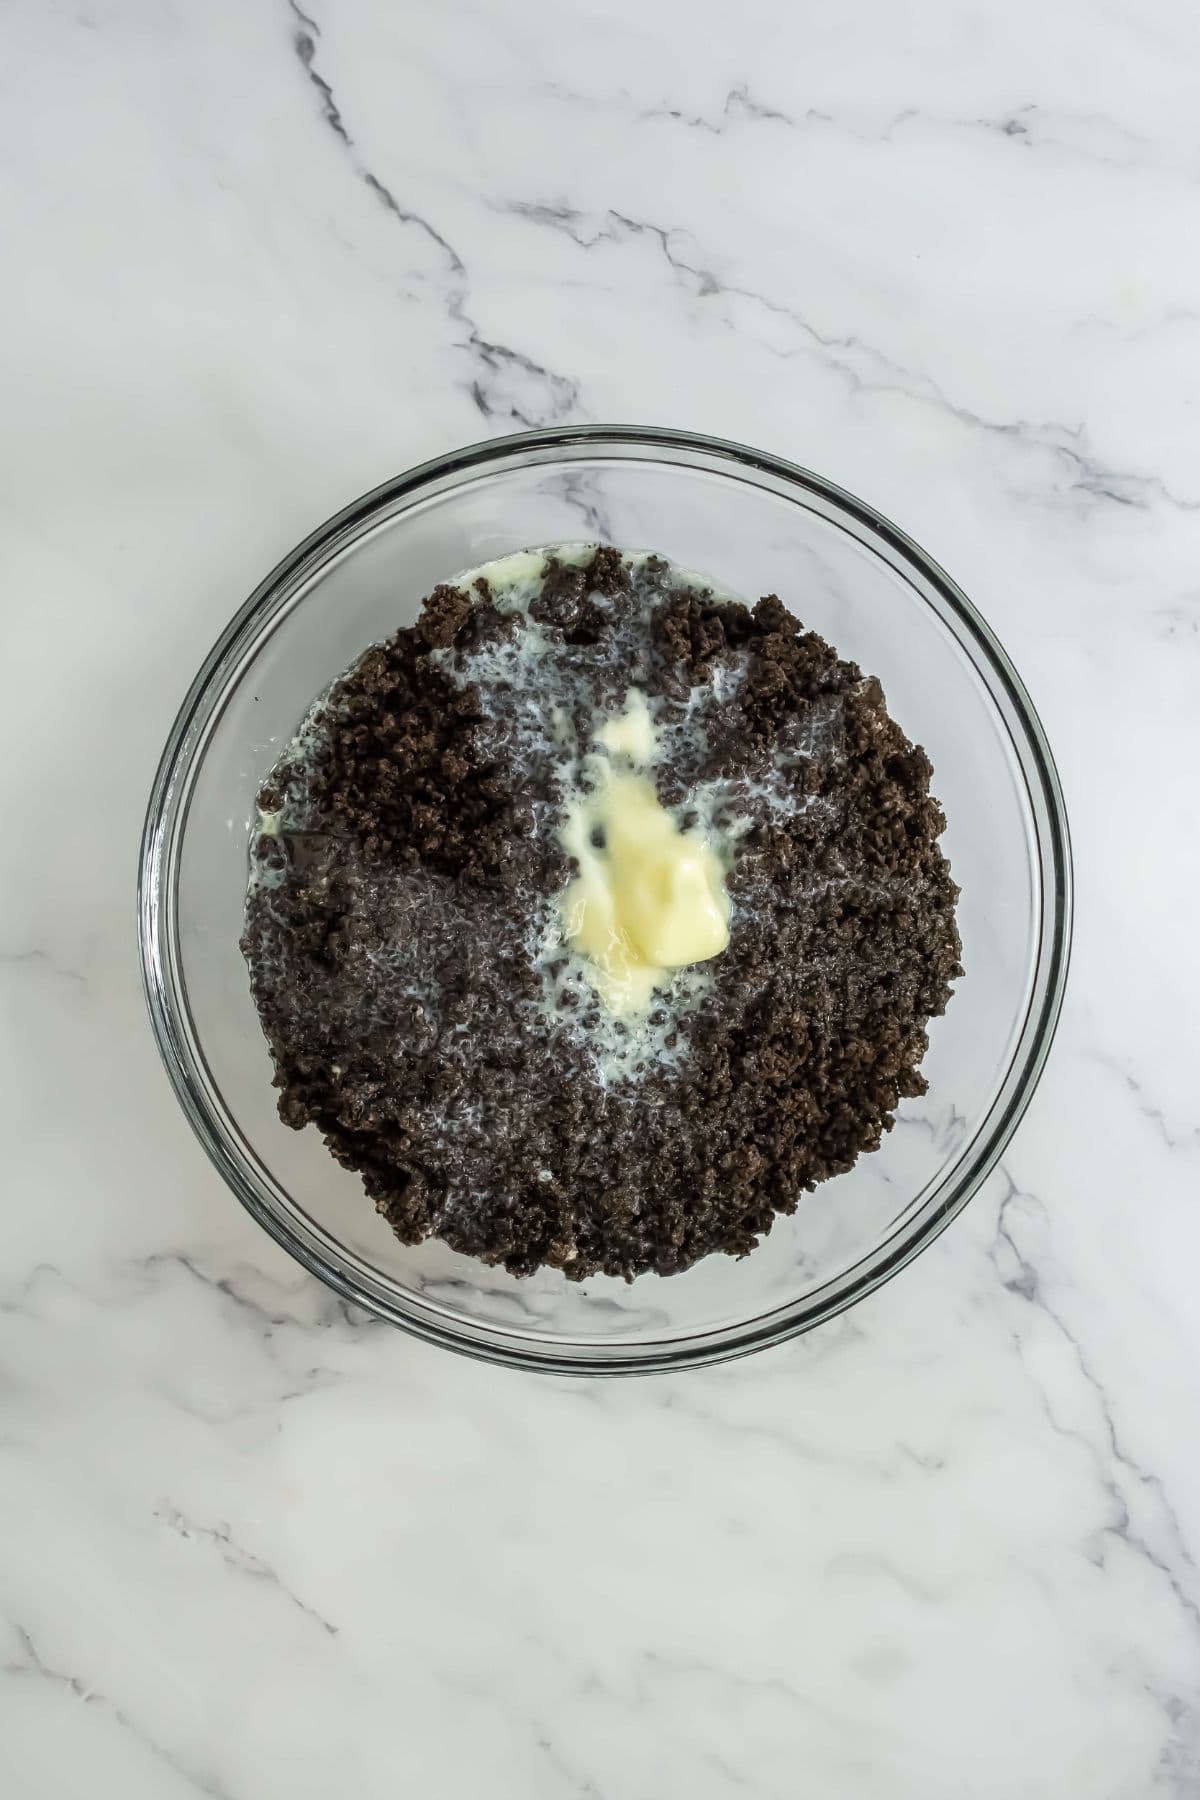
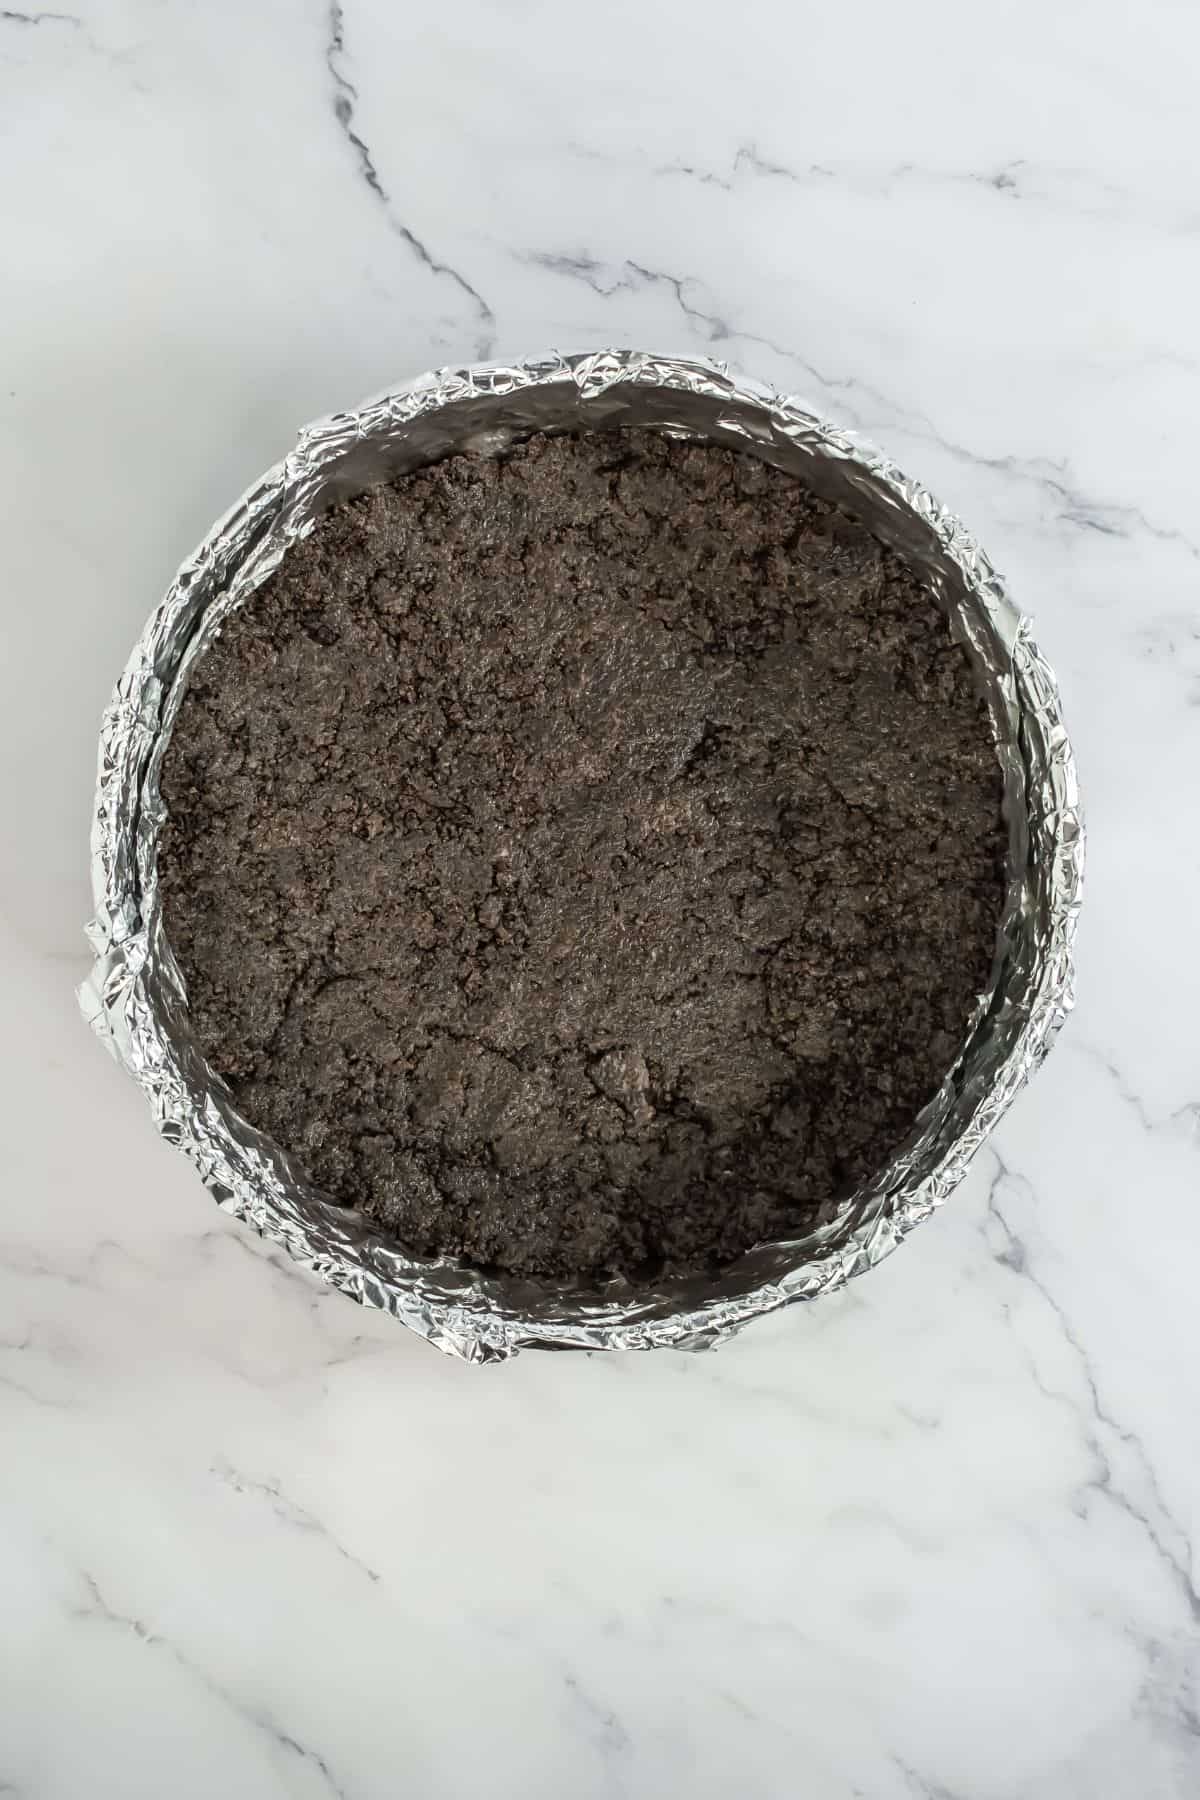
- Make the Oreo Crust: In a medium bowl, combine 1 (14.3-ounce) package of crushed Oreos and ⅓ cup melted unsalted butter. Press the mixture into the bottom of a lined 9-inch springform pan, forming an even crust. Set aside.
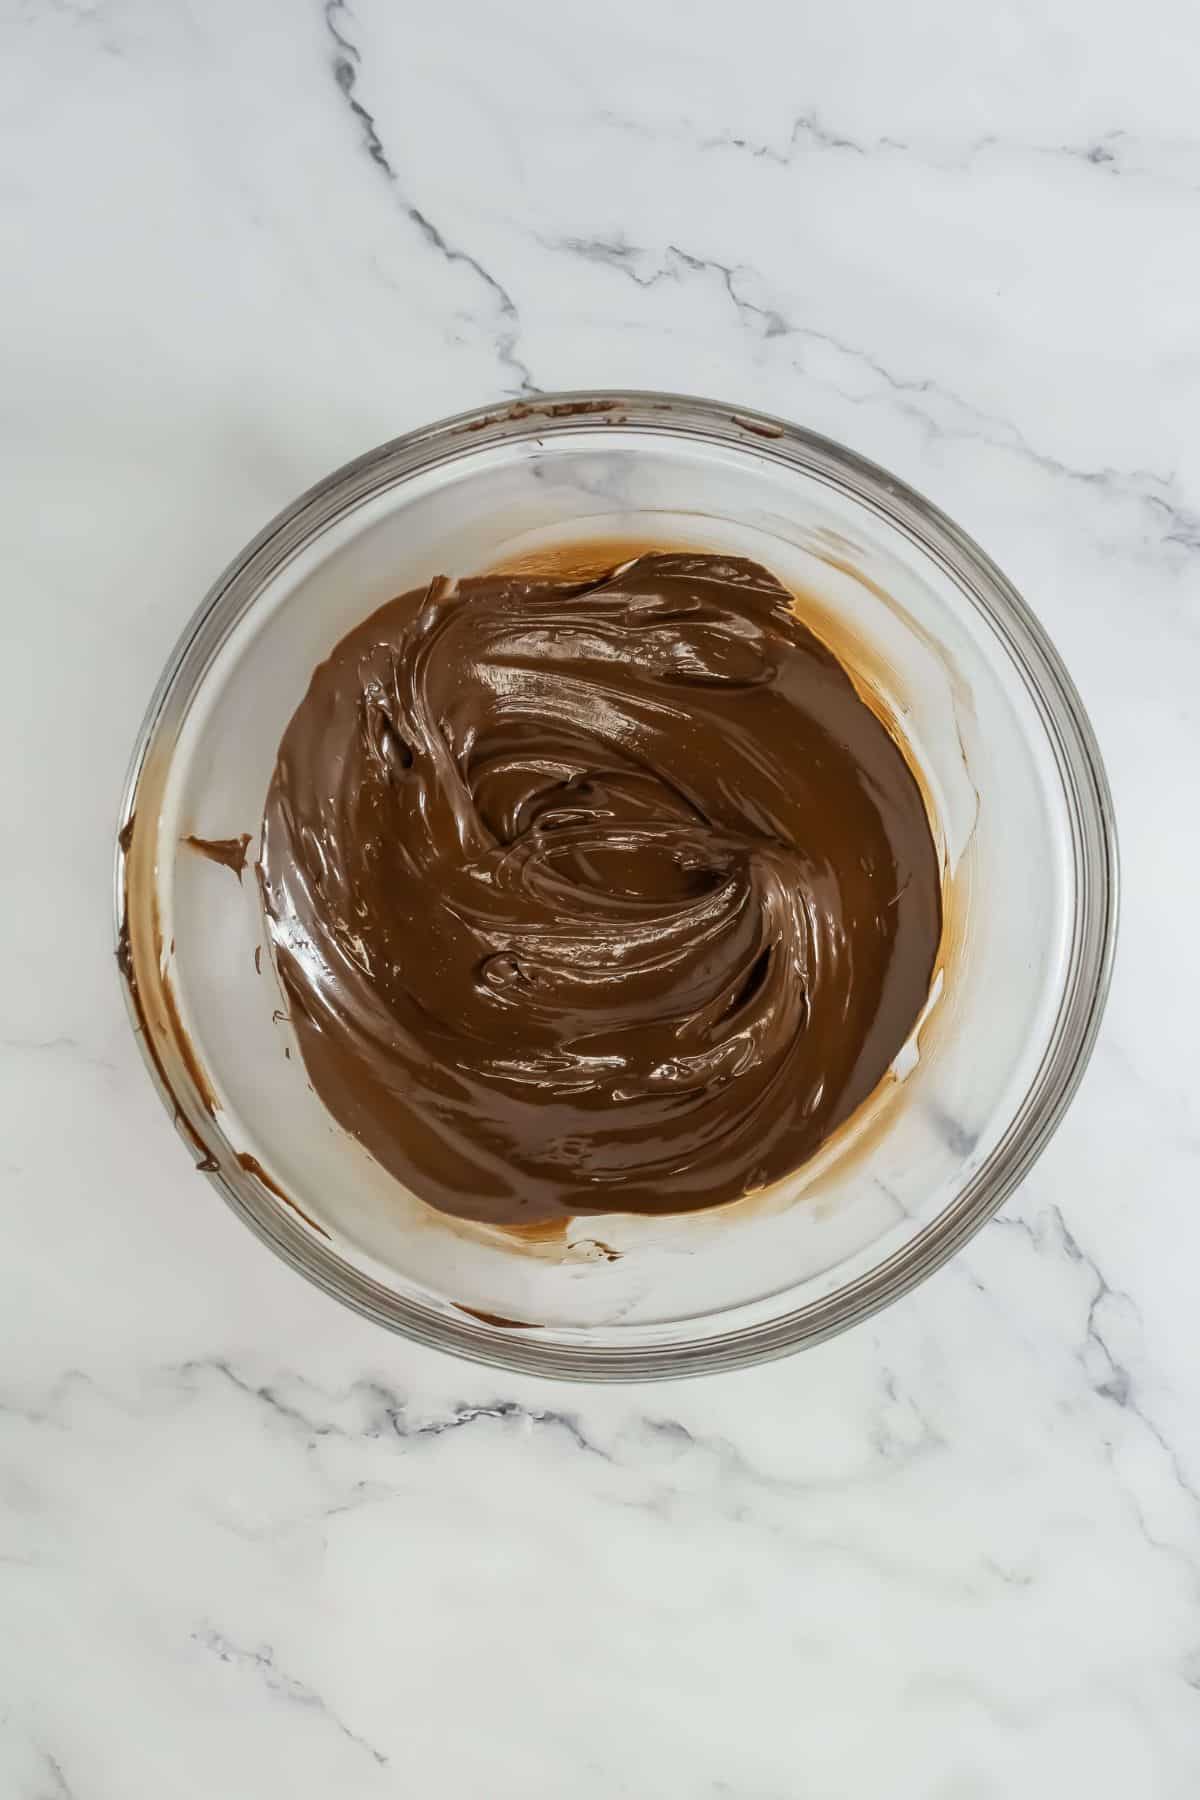
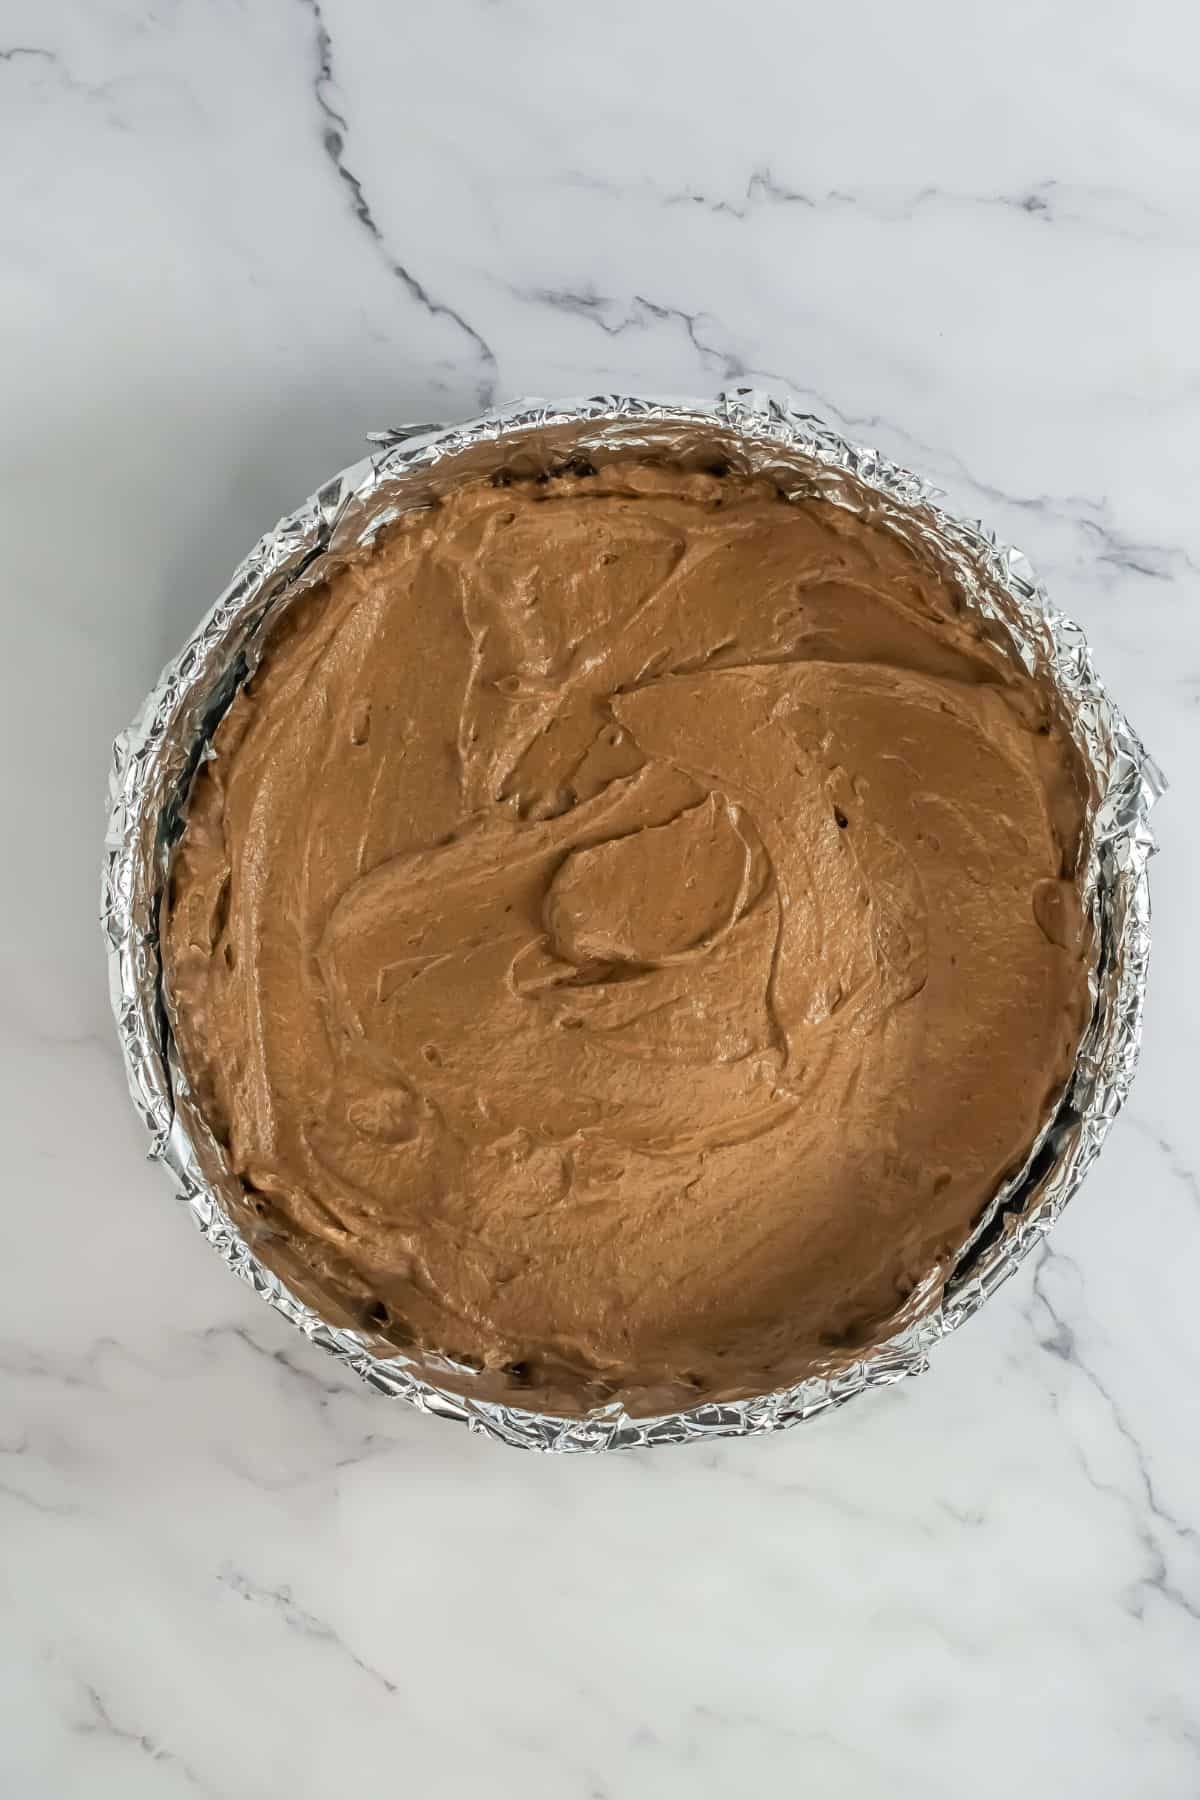
- Prepare the Chocolate Mousse Layer: In a medium microwave-safe bowl, melt 8 ounces semi-sweet chocolate chips in 30-second intervals, stirring between each until smooth. Let cool slightly.
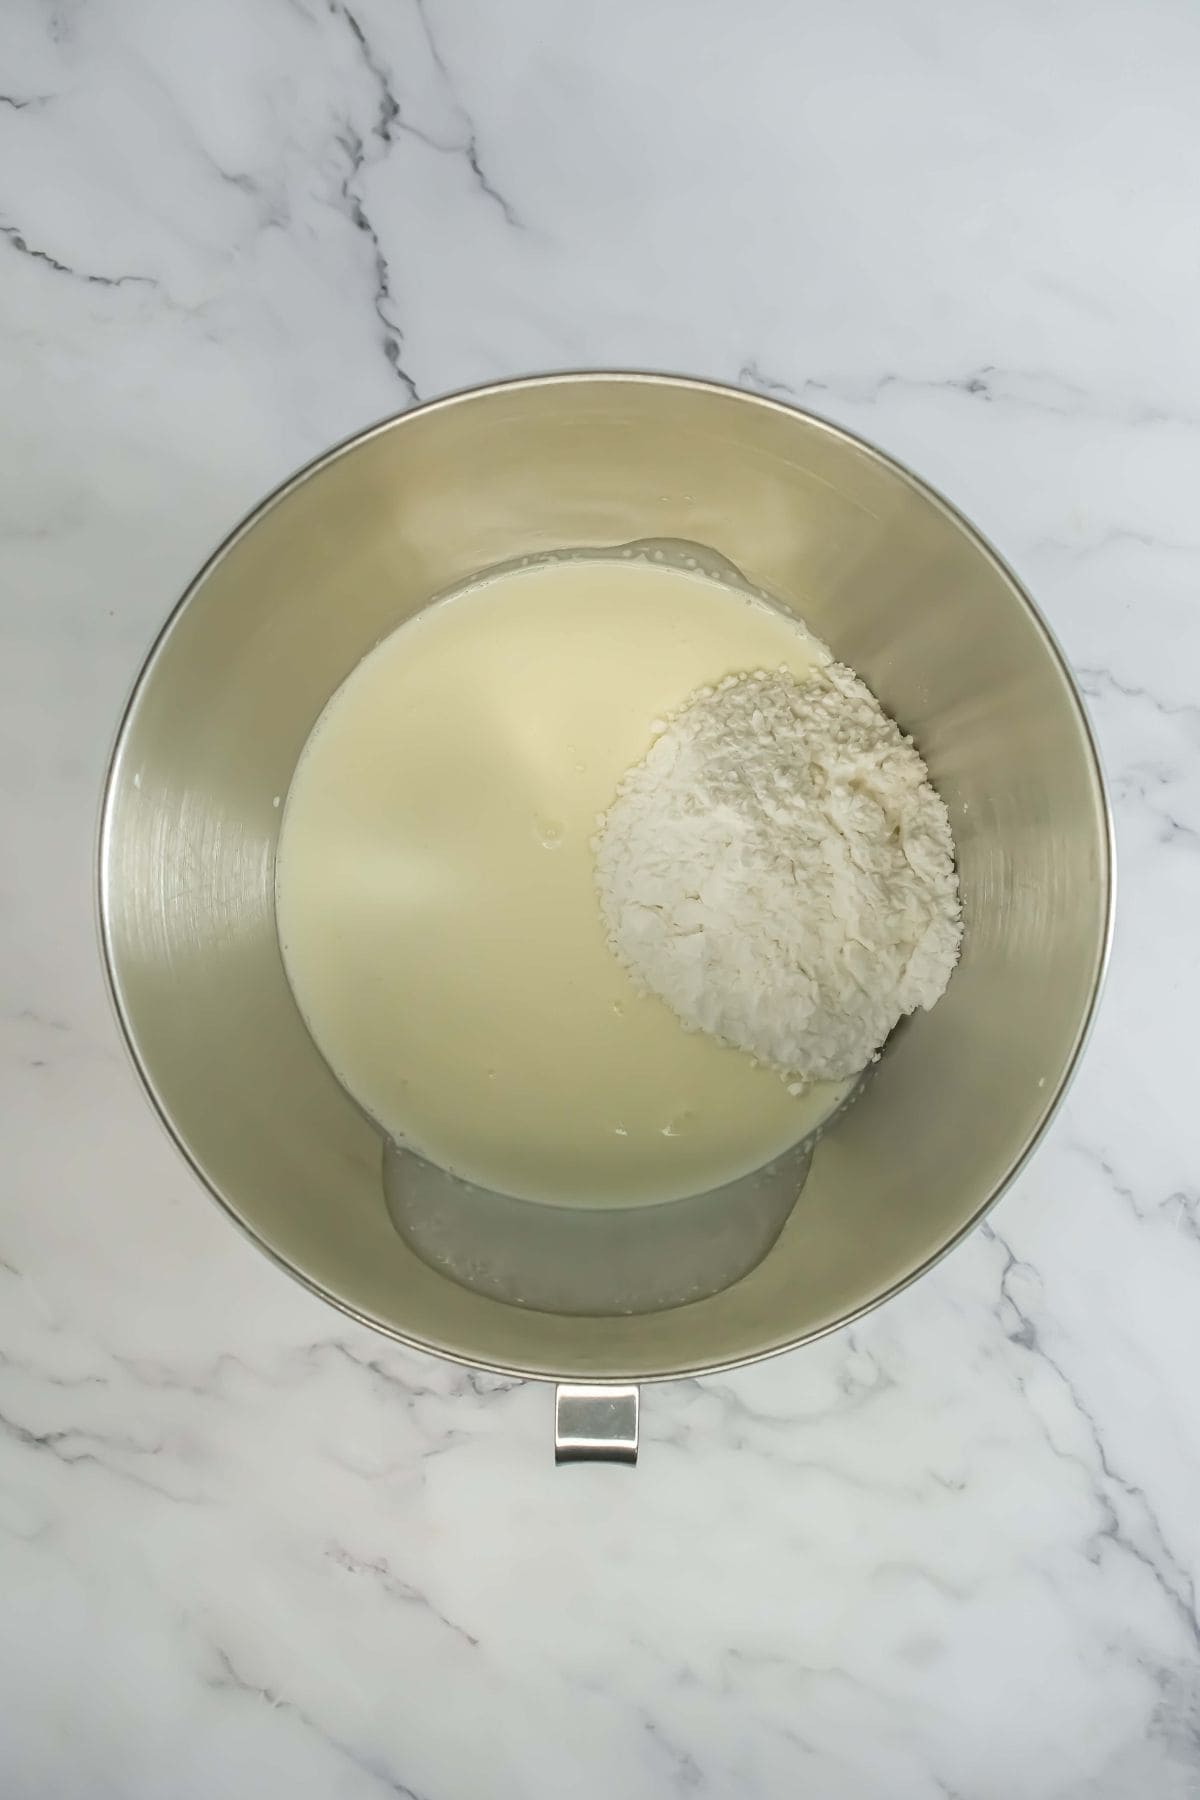
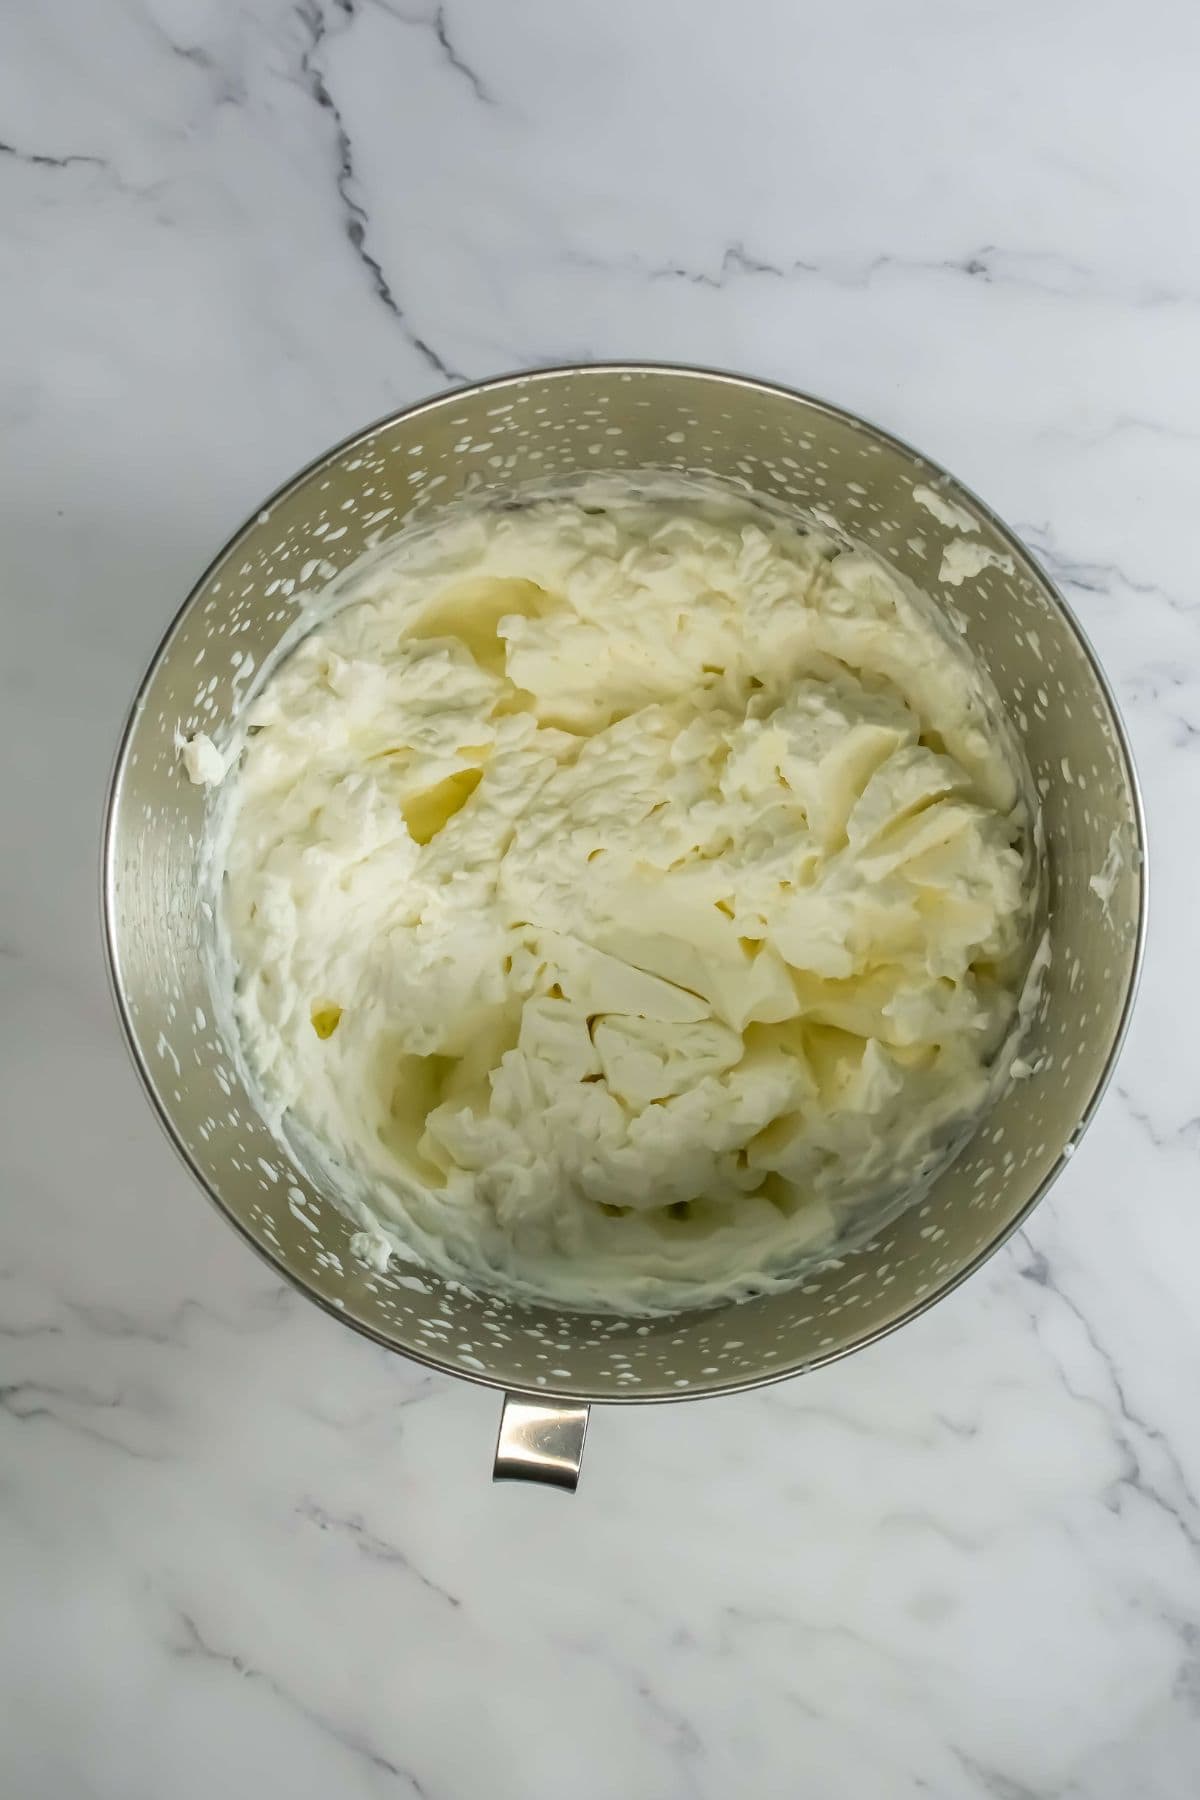
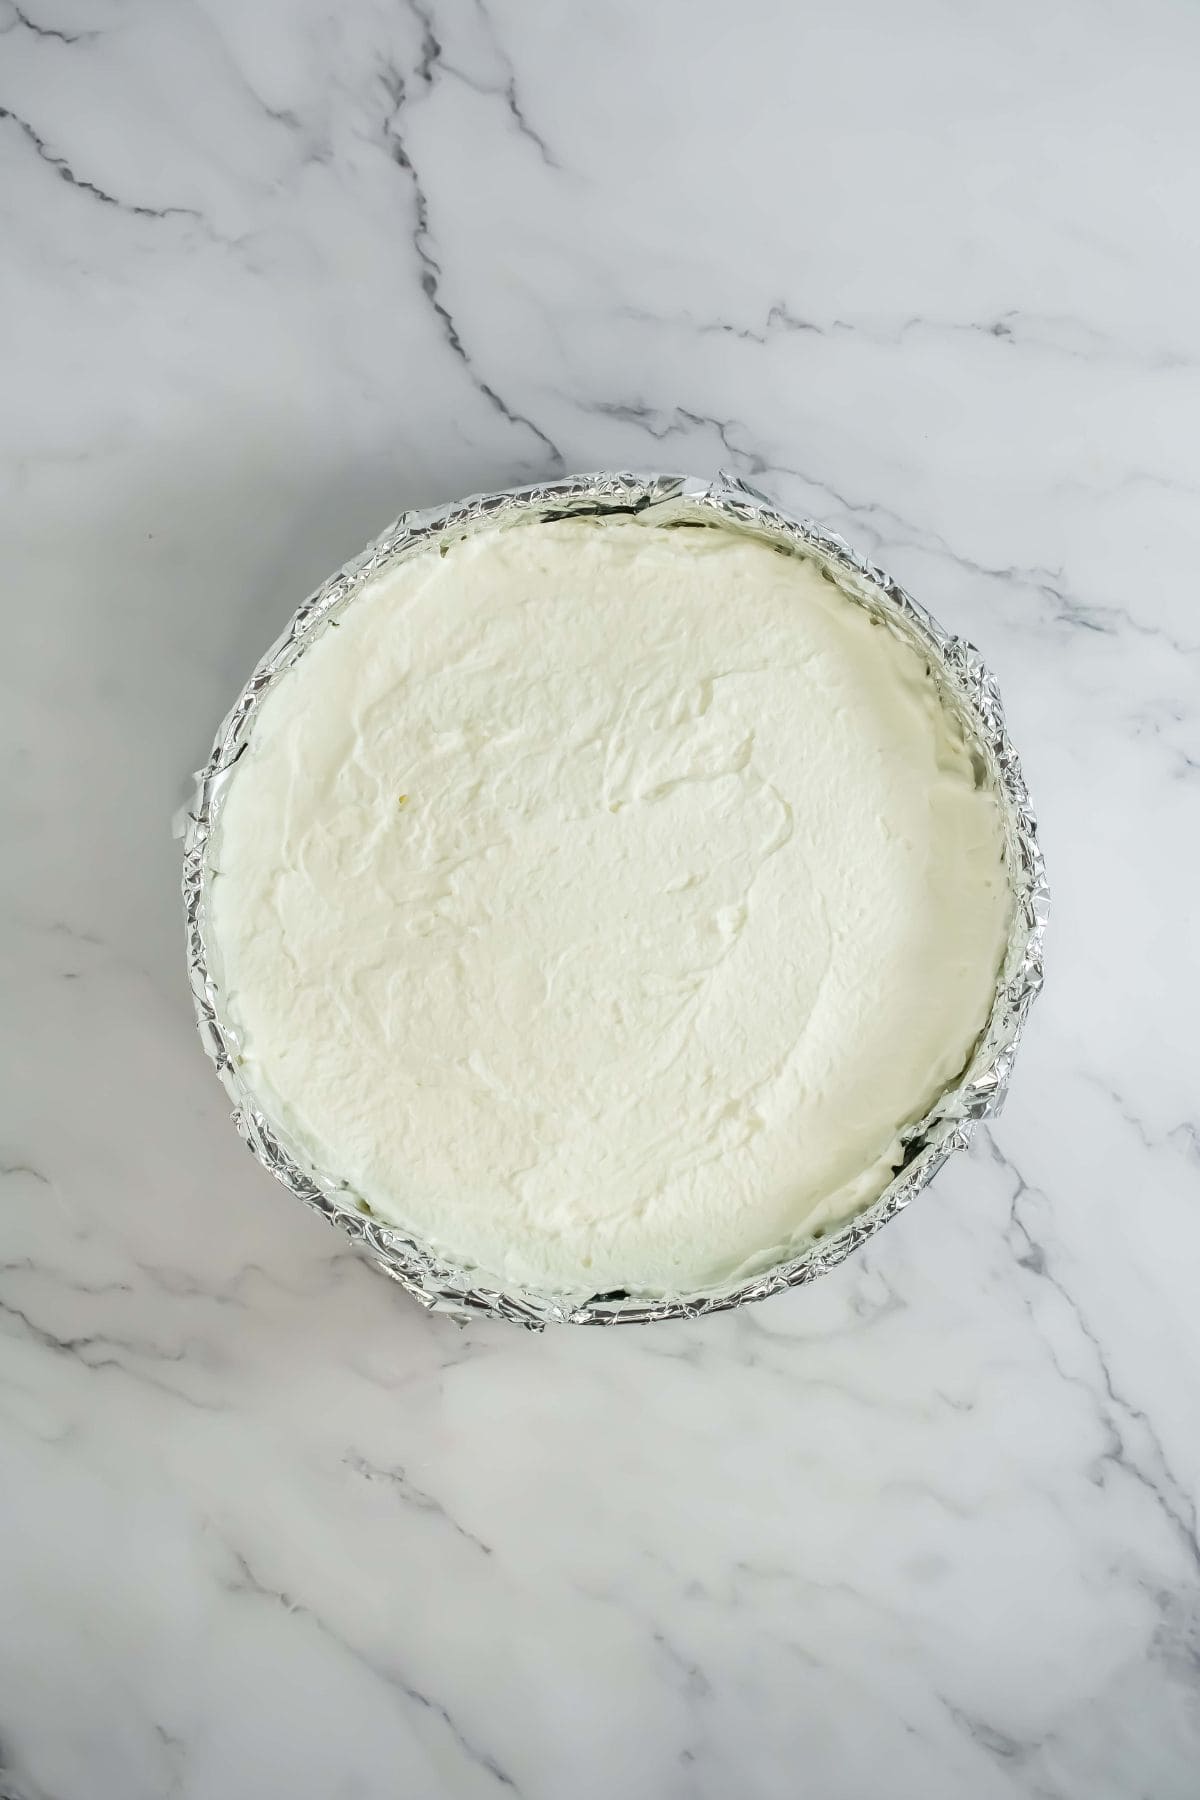
- Make the Whipped Cream: In the bowl of a stand mixer fitted with a whisk attachment, whip 3 cups heavy whipping cream and ½ cup sifted powdered sugar on medium speed until stiff peaks form.
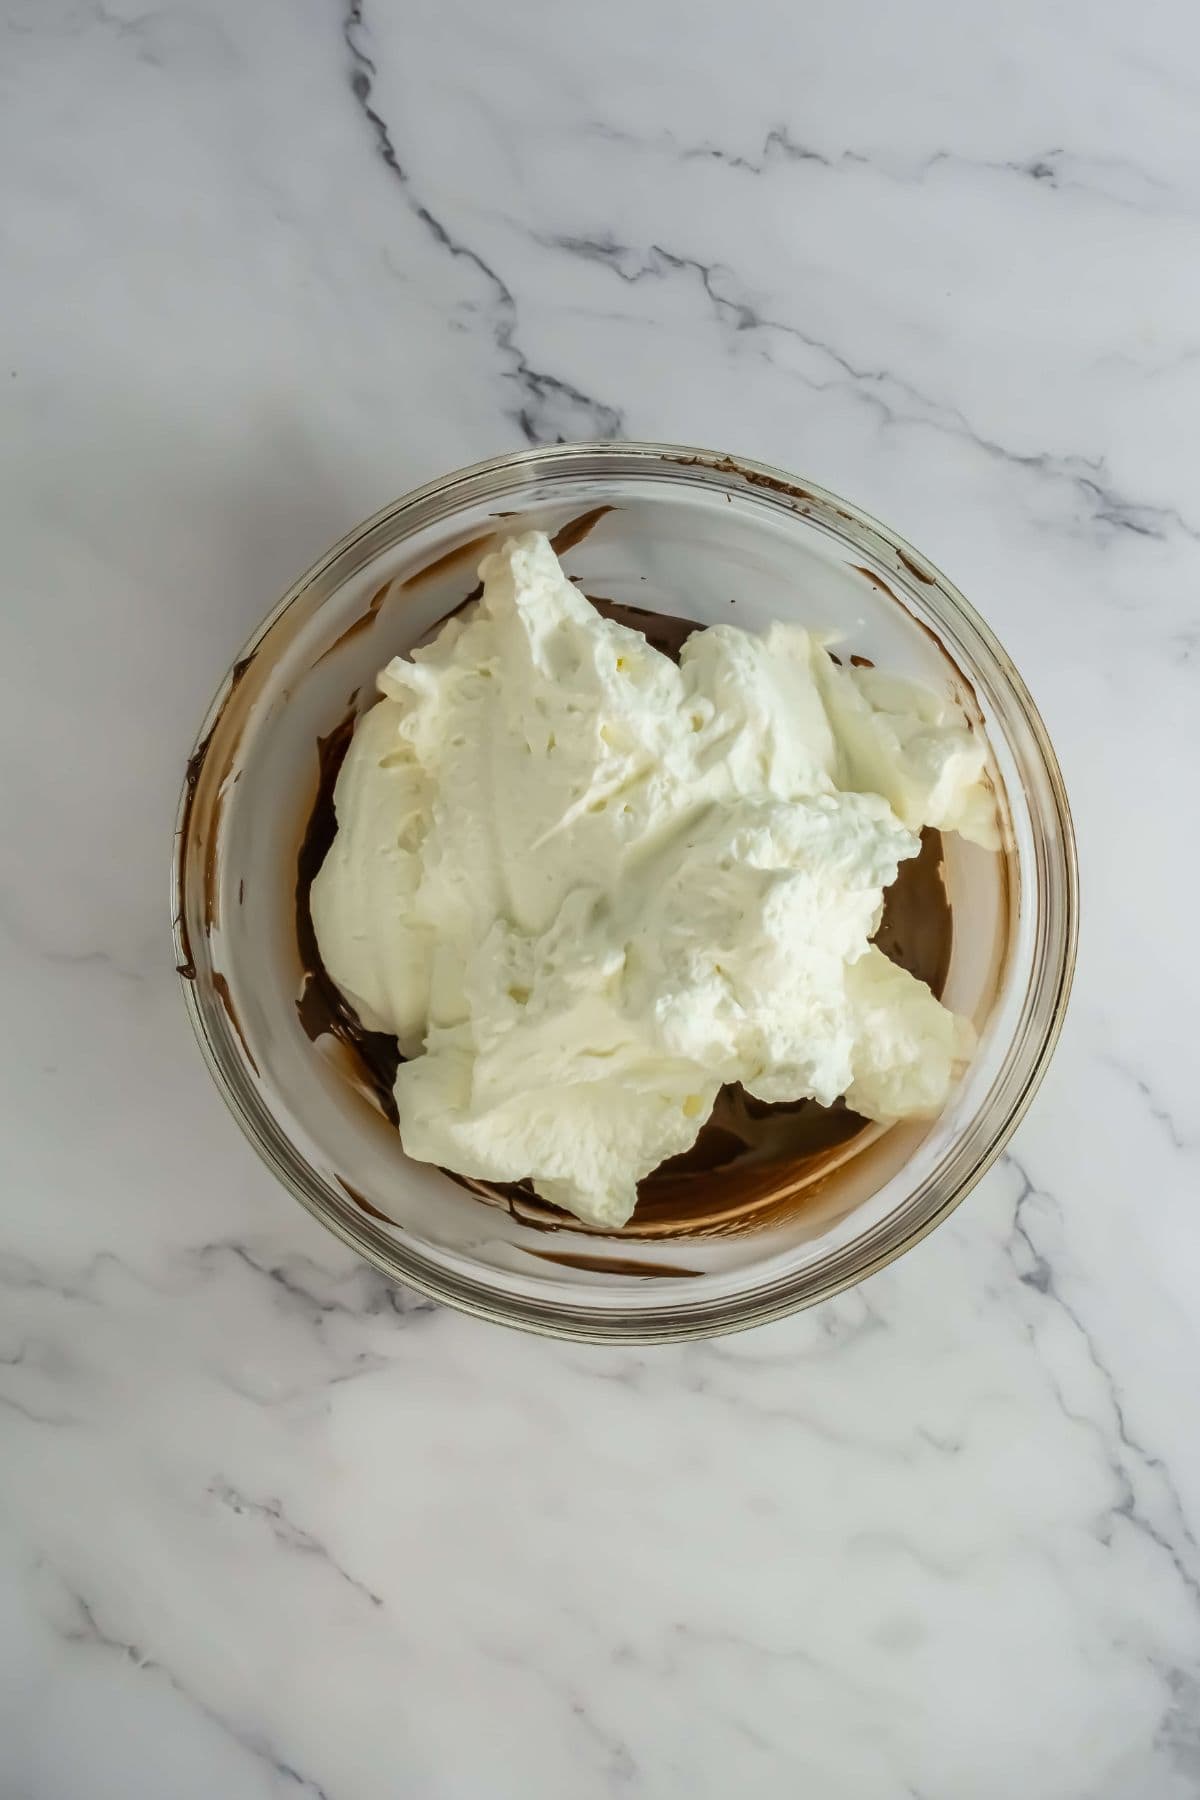
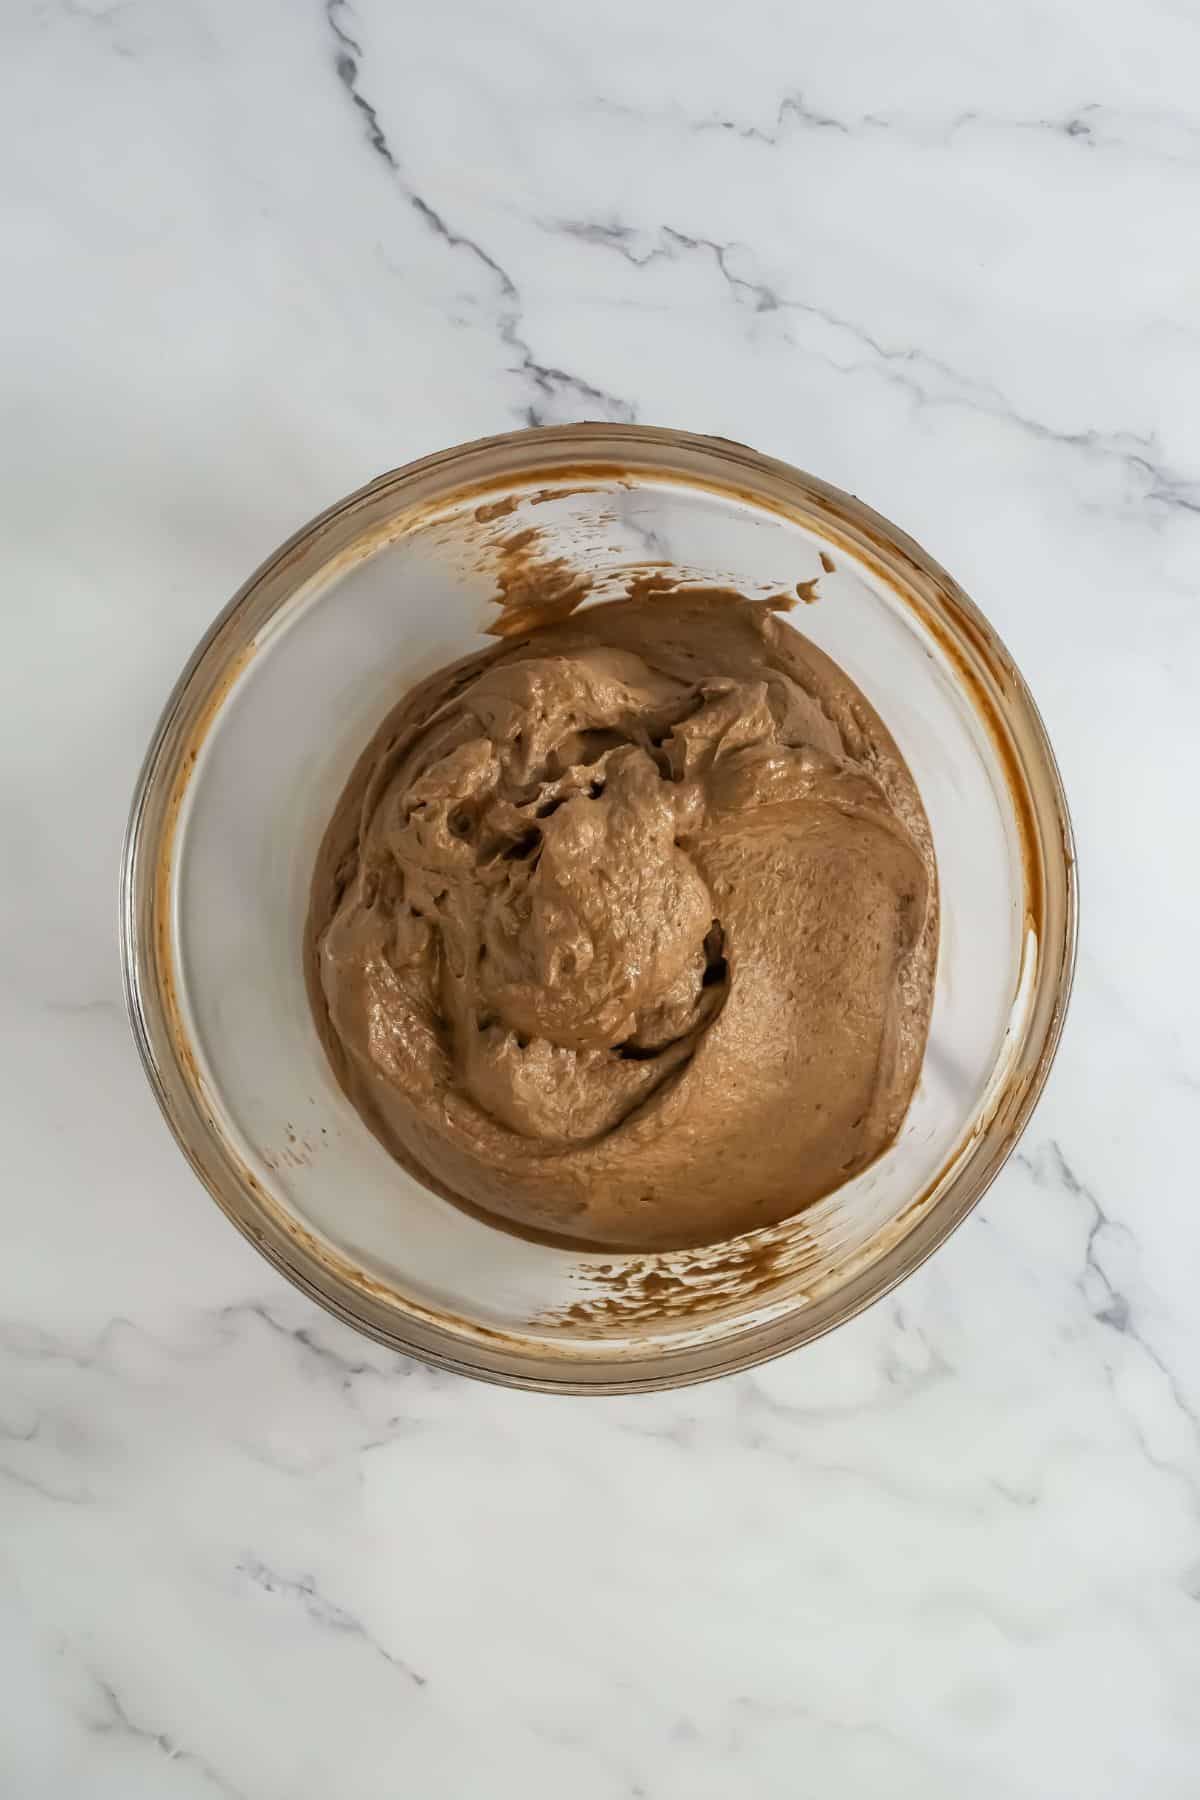
- Assemble the Layers: Gently fold half of the whipped cream into the slightly cooled melted chocolate, folding until fully combined. Pour the chocolate mixture over the Oreo crust in the springform pan, spreading evenly to the edges. Spread the remaining whipped cream evenly over the chocolate layer.
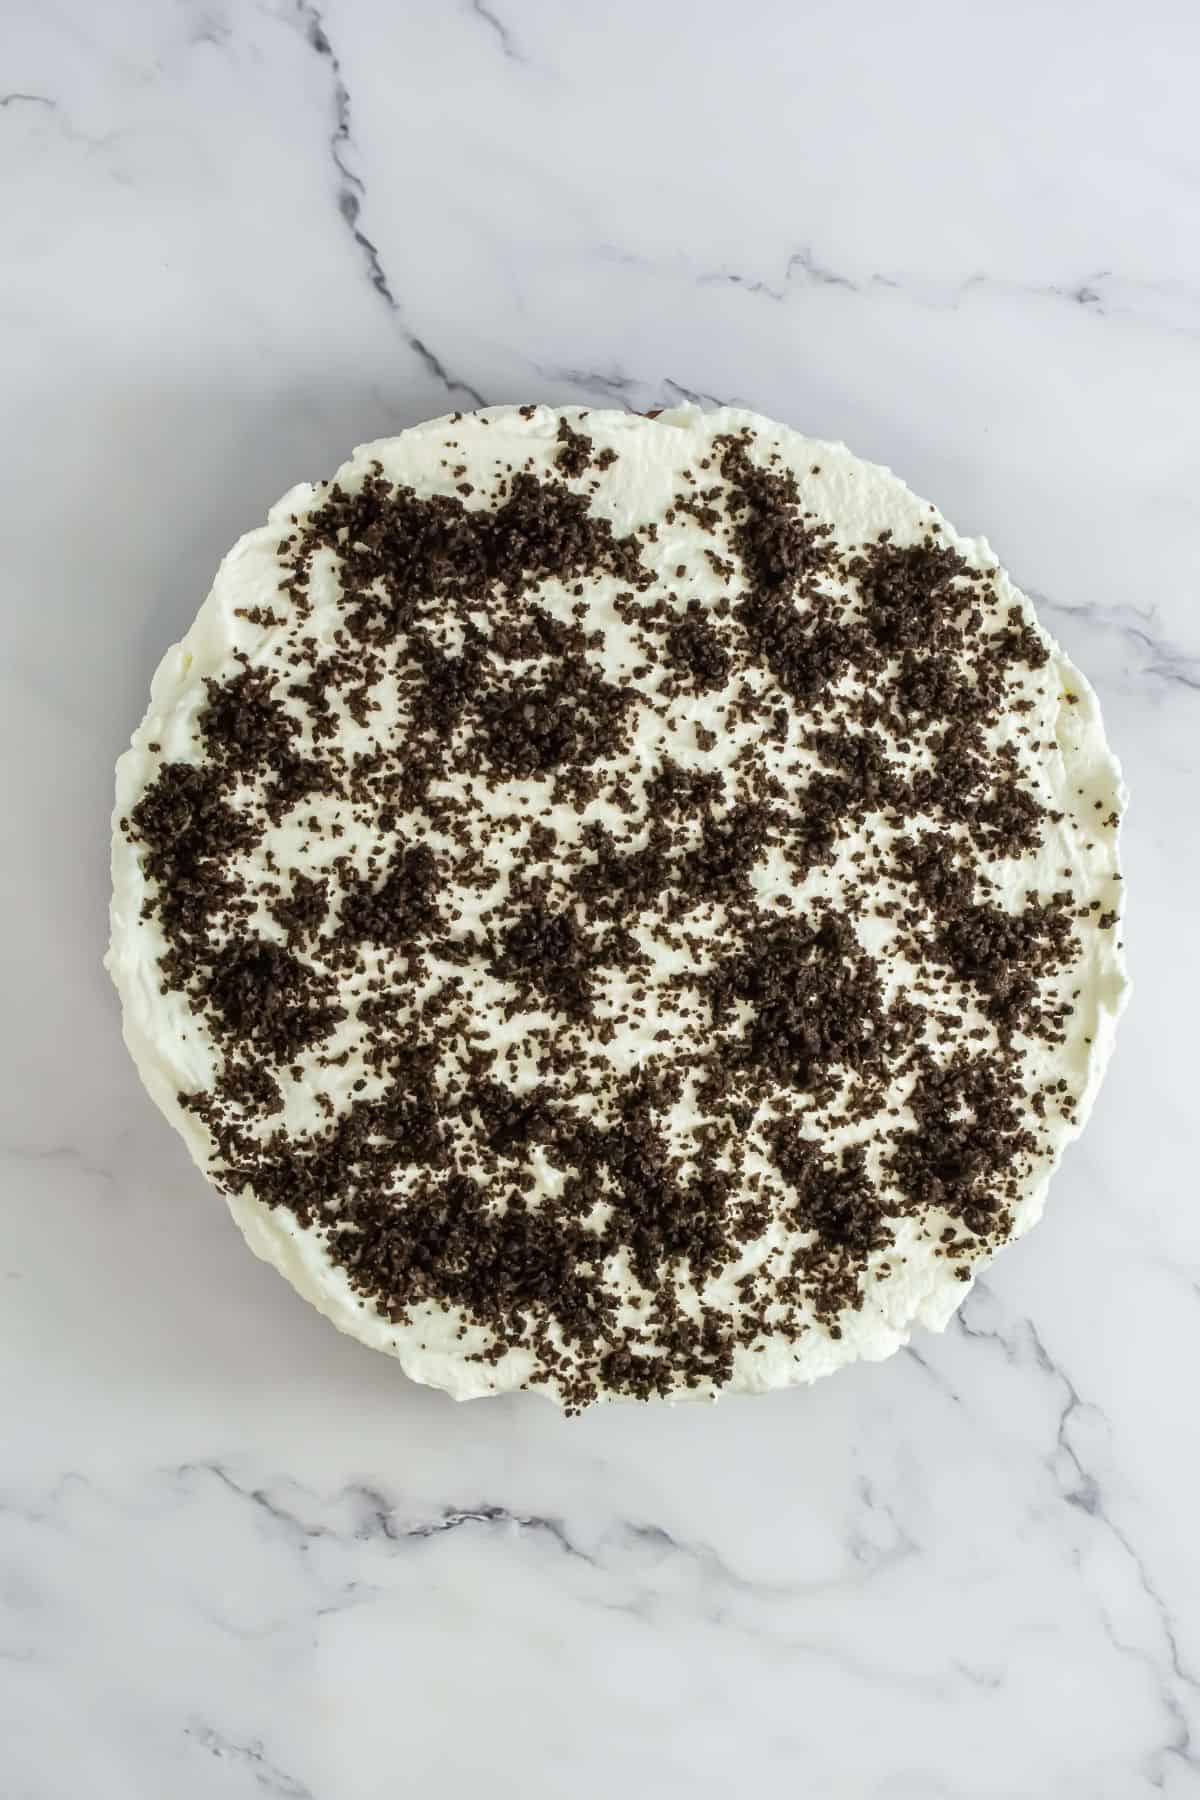
- Decorate & Chill: Sprinkle the top with additional crushed Oreos. Cover loosely with plastic wrap and refrigerate for at least 4 hours or until fully set.
- Serve: Once set, slice and serve chilled. Enjoy!
Notes
- Use a Food Processor for the Crust – Crushing Oreos by hand works, but a food processor will give you a fine, even crumb that holds together better when pressed into the pan.
- Line the Pan for Easy Removal – A 9-inch springform pan makes it easy to remove the cake cleanly, but lining the bottom with parchment paper ensures it doesn’t stick.
- Let the Chocolate Cool Slightly – If the melted chocolate is too hot when mixed with whipped cream, it can deflate the mousse. Let it sit for 5-10 minutes before folding it in.
- Fold, Don’t Stir – When mixing the whipped cream into the melted chocolate, use a gentle folding motion to keep the mousse light and airy. Stirring too hard will make it dense.
- Chill for the Best Texture – The cake needs at least 4 hours in the fridge to fully set, but overnight is even better for a firm-yet-creamy consistency.
- Want Perfect Slices? – Run a sharp knife under hot water, dry it off, and slice with a warm blade for clean, bakery-style cuts.
- No Springform Pan? No Problem! – Use a 9×9-inch square pan lined with parchment paper. Once set, lift the cake out and cut it into bars instead of slices.
Nutrition
Nutrition information provided is an estimate. It will vary based on cooking method and specific ingredients used.


Made this for the 4th and I didn’t even get to take a slice home!
haha awe.. I want to say sorry not sorry.. haha glad everyone enjoyed!
Made this yesterday and it was soo good!
So glad to hear that you liked it!